tomcat
Tomcat, or officially named Apache Tomcat is a light-weight web container used for deploying and running web application based on Java. Just like apache for PHP as container, tomcat’s role is becoming a runtime for java web application. There are so many web container in the world but i choose tomcat as this tutorial since tomcat is quite easy to be understood and the server management is not that difficult. So for beginner, tomcat is a good kickstart to a real application server. For development, tomcat is a best friend since it has a very quick startup and it’s reliable for small number of applications.
INSTALLING TOMCAT 7.0
1. Download your Tomcat 7.0
Download the latest tomcat 7.0 in here.
Note : I prefer to use the distribution version one, so i recommend to choose any files except the installer version for windows since it is easy to be modified and to be moved to other computer.
2. Extract the downloaded file
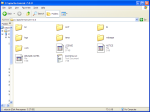
Extract the file, then you will see a structure like this :
After you finished this steps, you have succesfully installed your tomcat to your computer. Now let’s heading on the configuration.
CONFIGURING TOMCAT
1. Define administrator password
In tomcat, administrator term is defined as manager. In default, there will be no user in tomcat 7.0 as a manager. You have to add yours. To add new user, go to ${TOMCAT_INSTALLATION_DIR}/conf/ and open tomcat-users.xml.
At the first time you will see line 29 to 35 will be commented. Please uncomment these lines by removing tag. After that, add additional line for creating your user, and the code will be seen something like this :
<role rolename="tomcat"/>
<role rolename="role1"/>
<user username="tomcat" password="tomcat" roles="tomcat"/>
<user username="both" password="tomcat" roles="tomcat,role1"/>
<user username="role1" password="tomcat" roles="role1"/>
<user username="haka" password="haka" roles="manager-gui"/>
Note : Pay attention for the most bottom line. The username i set to “haka” and password set to “haka”. You can freely change these 2. But if you want the user to be manager, add manager-gui as the roles.
2. Configure local port
To configure any ports in Tomcat, go to ${TOMCAT_INSTALLATION_DIR}/conf/ and open file server.xml. After that, you can see whole configuration for server will be listed up there. For now, we will just customize port for host only. Go to line 67 in the file then you will see listing code like this :
You can change the port into any available port you like.
Note : If you have Oracle database installed, it might make a conflict since oracle listener use port 8080. So remember, if you have an oracle database installed, highly recommended that you change the port into other port, for example 8005, 8088, 8001, 8800,or whatever port you like ;). And also, you can change the connection timeout variable. This variable define how long will the system wait for starting the server. in this case, the value is 20000, means that the system will wait for 20 seconds IF the server is not tend to start.
I have oracle database installed in my current computer and i prefer port 8088, so that i change to port to 8088 :
<Connector port="8088" protocol="HTTP/1.1"
               connectionTimeout="20000"
               redirectPort="8443" />
For a while, you have done with the minimum configuration for tomcat.
3. Starting the service
For starting the service, go to ${TOMCAT_INSTALLATION_DIR}/bin/ then execute file startup.bat. If everything is working fine, you will see a pop up uneditable command prompt windows like this :
Congratulations!! You have succesfully started your tomcat server 😀
4. Accessing root directory in server
Go to your browser and type this :
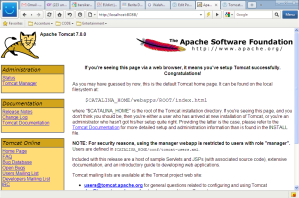
The 8088 port is really depend on what port you set in the server.xml. If you use 8080, then you have to type localhost:8080, and so on. If it’s successful, then you will see display like this :
5. Administering your server
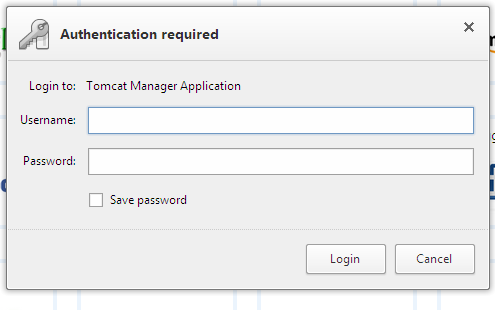
You have set your username and password for the manager. If you want to administer your server, go to http://localhost:8088/manager/html. Then a pop dialog will be prompted, requesting user name and password.
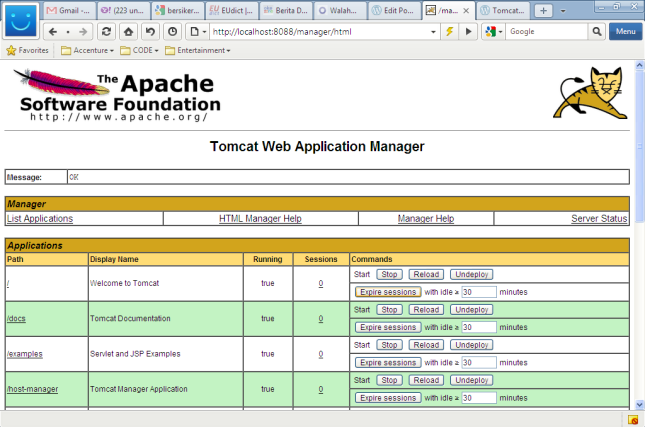
Enter your username and password (for my case, user is haka and password is haka). If it’s succesfull, the screen will drive you to the manager screen :
You can customize your server, customize the application deployed and you can even deploy your web application via this screen.
That’s tutorial for beginners of Tomcat. Next time i will prepare the tutorial of how deploying your first java web application. Stay tune ;). God bless!


